Caedes
Upload Images
Welcome guest
Log In or Register
User Stats
- 2 total users online
- 65 users active today
- 265879 total members
- +show users online
Resizing tutorial
Dlds: 1024
Status: active
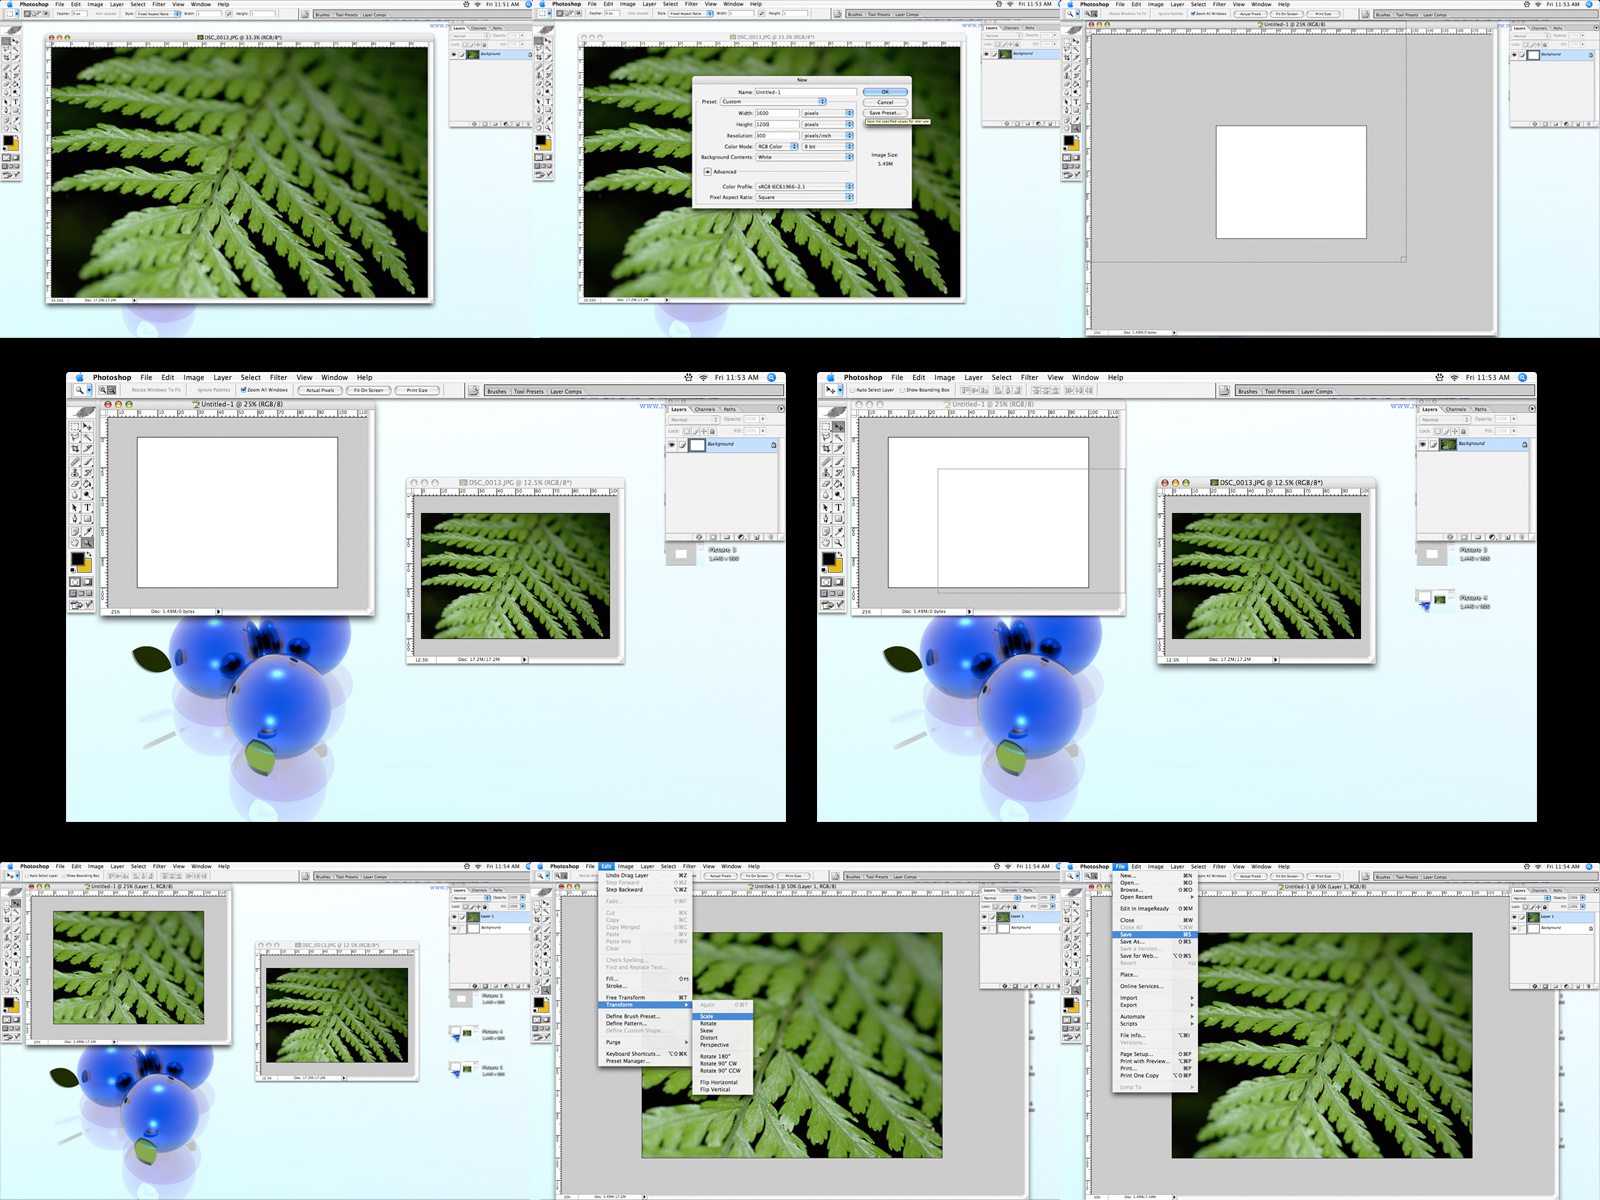
1. Open the file you want to resize. The one I have used here is 3008 x 2000.
2. Open a "New" file and make it the size you want the final image to be. Here I want my final size to be 1600x1200.
3 & 4. Zoom out a bit and resize your windows so you can easily view and work with them both at the same time.
5. CLICK & HOLD the mouse pointer on the photo; DRAG it over into the other empty window.
6. We now have the 3008x2000 photo in the 1600x1200 frame. You can close the original file as we no longer need it.
7. Access the "EDIT->TRANSFORM->SCALE" command. You can now scale the photo to fit in the 1600x1200 frame the way you want it to. Just fiddle around until you get a result you want (if you want to make the photo smaller than the frame, just make the background layer black and it will act as a border).
8. When you're happy with the result, SAVE the file in JPG format.
More images and prints available in my Deviant art and Redbubble galleries.